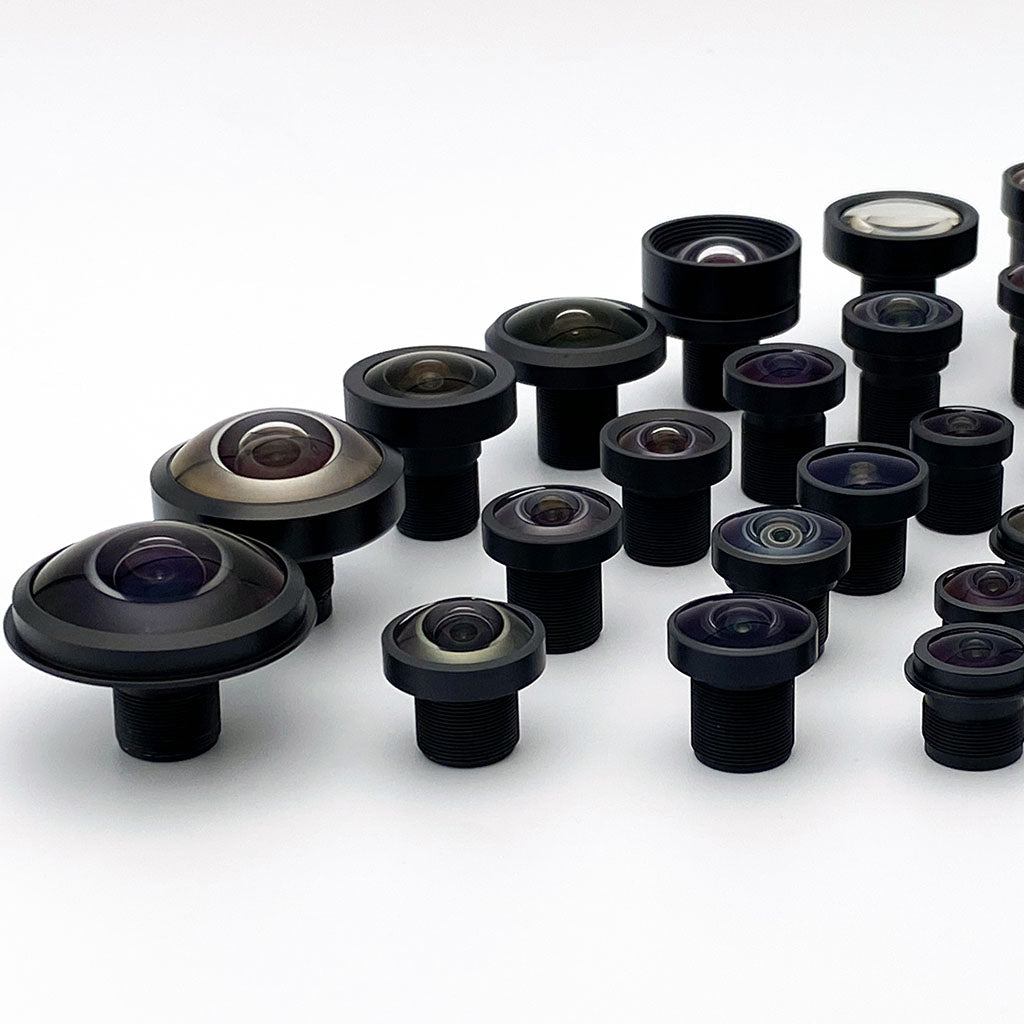

カメラのピント調整の背後にある物理的原理とは?
Camera focus happens when light rays from your object converge precisely onto the image sensor.
The distance between lens and sensor where sharp focus occurs is the lens-to-sensor spacing, not the back focal length, a fixed rear-vertex-to-rear-focal-point distance at infinite conjugate (Smith, Modern Optical Engineering, 4th ed.). Adjusting focus changes this spacing to match the working distance.
For M12 lenses, each full rotation moves the lens 0.5mm (the M12×0.5 thread pitch). How far the object plane moves depends on the conjugates. The differential |Δu| ≈ (u/f)² × |Δv| (u working distance, f focal length, Δv axial travel) holds for small rotations only. Over a full turn it badly overshoots.
For a full turn, use the exact thin-lens conjugates: v = uf/(u − f), v′ = v + 0.5mm, u′ = v′f/(v′ − f). A 4mm lens focused at 300mm refocuses near 33mm, a swing of roughly 267mm. An 8mm lens lands near 97mm, roughly 203mm. One full turn is a coarse move. Step 5 below works in 1/16-turn increments.
C-mount lenses work differently: you turn a focus ring instead of threading the whole lens. What the ring drives is design-specific: some designs move internal groups on a cam, while others use unit focusing (the whole cell in a helical), front-cell focusing, or fixed focus.
知っておくべき重要な用語
有効焦点距離(EFL):画角と被写界深度を決定します。これは通常、レンズの仕様表に記載されている項目です(例:「4mmレンズ」)。
Mechanical Back Focal Length: Distance from a rear mechanical reference on the lens housing to the sensor. M12 has no standardized flange, so the reference surface varies by vendor. Take it from the specific lens drawing. This determines if a lens physically fits your camera.
フランジ焦点距離:Cマウントシステムの場合、マウントフランジからセンサーまでの距離は17.526mmと標準化されています。
Note: Optical back focal length, from the last optical surface to the image plane, is what the designer budgets against the IR-cut filter and cover-glass stack, rear-element clearance, and the exit pupil position that sets chief ray angle. Mechanical back focal length, from the vendor-defined rear housing reference, tells you whether a lens fits and reaches focus.
Browse Commonlands M12 lenses or C-mount lenses, and check your sensor's pixel size and optical format on our image sensors reference. The lens image circle must cover the sensor's full diagonal.
M12レンズのピントはどのように合わせればよいですか?
M12 focusing means systematically threading the lens while monitoring image sharpness. Each rotation moves it 0.5mm. Use a stable target at the intended working distance and compare focus across the field.
Thread tolerance mismatches between M12 lenses and holders often leave the lens sitting at a slight angle, making one side of the image sharp and the other blurry, a problem detailed in our M12 lens technical guide. Align the target with the sensor plane before judging lens performance. A level ceiling fixture can help establish target geometry, but lens-to-sensor tilt requires mechanical alignment of the lens, holder, or sensor. Aiming upward does not correct it.
カメラをしっかりと取り付ける
ボードレベルのカメラを、被写体の方を向くように、あるいは天井を撮影する方法の場合は上向きになるように、しっかりと固定してください。ピント合わせ中のわずかな動きでも、結果に影響が出ます。
位置測定チャート
Place four test charts halfway from center to corner, at 0.5 field height. Unequal sharpness among them flags a problem, but not its cause: sensor tilt, field curvature, astigmatism, and decentered elements can all look alike here. Through-focus checks at center and corners tell them apart.
均一に照らす
視野全体に均一な照明を当ててください。照明のムラがあると、誤ったコントラストのグラデーションが生じ、ピントの問題が見えにくくなる可能性があります。
適切な露出を設定する
ピントを合わせる前に、グレーカードを使用して適切な露出設定を行ってください。OECFおよびColorCheckerの手順については、以下の詳細な露出設定ガイドをご覧ください。
レンズをねじ込んでピントを合わせる
1/16回転ずつ回転させてください(軸方向の移動量は31.25μm)。中心部だけでなく、すべての測定点で同じ鮮明度が得られるか確認してください。
ロックして確認
UV+熱による二重硬化型接着剤を塗布するか、機械式ロックリングを取り付けた後、ロック中に焦点のずれが生じていないことを確認してください。

プロのアドバイス
Ceiling target focusing is standard practice at Commonlands' assembly facility, where production lines use precision ceiling fixtures with integrated lighting. Our assembly services cover production volumes from 100 pieces minimum order.
Cマウントレンズのピントはどのように合わせればよいですか?
C-mount lenses have a fixed 17.526mm flange focal distance. You focus by rotating the focus ring, not by threading the whole lens like M12.
Cマウントのフォーカス調整手順
- レンズをカメラに取り付ける:Cマウントレンズを、フランジが接触するまでマウントに完全にねじ込みます。これにより、17.526mmの正確な間隔が確保されます。
- 絞り設定:ピント合わせ中は、最も明るい視野が得られるよう最大絞りまで開き、ピント合わせが終わったら、作業用のF値まで絞ってください。
- Rotate focus ring: Turn the focus ring (not the entire lens) while viewing live image. Focus-ring travel varies by lens.
- Verify across field: Check center and corners at working aperture. Acceptable center-to-corner MTF variation depends on frequency, field, and wavelength.
- フォーカスリングの固定:操作中のズレを防ぐため、フォーカスリングの止めネジを締め付けるか、取り外し可能なネジロック剤を塗布してください。
Commonlands C-mount lenses cover 1/2" to 1" sensors with low-distortion designs suited to measurement applications.
クイックリファレンス:M12 対 Cマウント
- M12ねじピッチ 1回転あたり0.5mm
- Cマウントのフランジ距離 17.526mm
- M12のフォーカス方法 スレッドレンズの出し入れ
- Cマウントのフォーカス方法 フォーカスリングを回す
オーバーシュート法を使って、ピークフォーカスをどのように見つければよいですか?
Sweep through the relevant focus range and compare the measured sharpness scores. Passing one peak does not prove it is the best over the full range. After reversing direction, take up mechanical slack and approach the final setting from a consistent direction. Recheck focus after locking.

なぜオーバーシュートが有効なのか
1. Eliminates backlash: M12 thread backlash varies by lens and holder.
2. 全球最大値を確認する:この点を通過することで、局所的な極値で立ち止まっていないことを確認できる。
3. 再現性を確保する:常に同じ方向からアプローチすることで、一貫した結果が得られる。
どのフォーカスロック方式を選べばいいですか?
The choice of focus locking method for board level cameras affects long-term stability, serviceability, and production throughput.
| 方法 | 硬化・固化時間 | 強さ | リバーシブル | おすすめ |
|---|---|---|---|---|
| UV硬化型接着剤 | Seconds to a minute (per datasheet) | 中程度 | いいえ | 屋内/管理された環境 |
| UV+熱によるデュアルキュア | UV pass + thermal bake (per datasheet) | 高 | いいえ | 自動車、アウトドア、高振動 |
| ロックリング | 直ちに | 中程度 | はい | 研究開発、現場での修理が可能なユニット |
| PTFE/テフロンテープ | 直ちに | 低 | はい | プロトタイピング、仮設のセットアップ |
コモンランズによる提言
For production volumes, we recommend UV+heat dual cure adhesive applied as a small fillet around the lens-holder interface. In our assembly work it holds optical alignment through temperature cycling better than UV-only cure. Validate the specific adhesive against your own environmental requirements.
被写界深度はどのように計算すればよいですか?
Your DOF depends on focal length, working f-number, working distance, and the permissible circle of confusion, the blur diameter you accept at the sensor. That last term follows from pixel pitch, not sensor format, so two cameras of the same format with different pitches have different usable DOF.
ぜひ当社の 「カメラ被写界深度計算ツール」 をご利用いただき、お使いのレンズとセンサーの組み合わせ、および撮影距離の要件に最適なピント設定をご確認ください。
組み立て前に適切な露出を設定するにはどうすればよいですか?
Set exposure before final focus locking so image quality stays consistent across production. Standardized targets, such as ColorChecker gray patches or OECF charts, support repeatable measurements. Use them to measure and reduce unit-to-unit variation within the acceptance limits for the camera. Lens transmission, sensor response, illumination, and processing settings can still differ.

簡単な露出設定の手順
グレーのターゲットを位置合わせ
作業距離の位置に、18%のグレーカードまたはColorCheckerのグレーパッチを置き、撮影用照明の下に配置してください。
標準の照度を設定する
生産時の照明条件を設定してください。すべてのユニットで再現性を確保できるよう、ルクス値を記録してください。
センサー設定の調整
On an sRGB-like pipeline, 18% gray sits near code value 118 (46% of 255). The right target depends on your ISP.
ドキュメントの設定
露光時間、ゲイン、およびISPパラメータを記録してください。これらは、すべてのモジュールにおける制作基準となります。
生産において極めて重要
Always set exposure parameters before applying focus lock adhesive. Exposure time and gain do not move focus, and among the exposure settings only aperture changes depth of field (DOF also depends on focus distance, focal length and magnification, and your circle-of-confusion criterion). Commonlands' assembly service includes standardized exposure calibration with professional gray targets.
よくある集中力の問題とその解決策とは?
These are the failure modes Commonlands sees most often in module assembly, with their root causes and fixes.
| 問題 | 症状 | 根本原因 | 解決策 |
|---|---|---|---|
| フォーカス・ドリフト | 数時間から数日の経過とともに鮮明度が低下する | 機械的な緩み、ロックが弱い | UV+熱によるデュアルキュア、適切なトルク仕様 |
| コーナーのぼかし | 中心はシャープ、周辺はソフト | センサーの傾き、フィールドカーブ | Check target alignment and lens-to-sensor tilt. Evaluate field curvature |
| 材料の不適合 | 環境によって焦点が変化する | CTEの差異、可塑性要素 | Athermal system design: optics, barrel and spacer CTE, adhesive |
| 振動による緩み | 運転中の焦点のずれ | 締め付けトルクが不十分 | デュアルキュア型接着剤+機械的保持 |
| 単位の変動 | カメラごとに異なる焦点設定が必要です | 部品の公差の累積 | 能動的なアライメント工程、部品に対するより厳格な品質管理 |
プロ向けカメラモジュール組立サービス
Commonlands assembles camera modules with professional focusing, starting at 100 pieces minimum order quantity. Clean room facilities and precision alignment fixtures keep results consistent for robotics, surveillance, and automotive builds.

最低注文数量:100個
大量の発注最低数量(MOQ)を必要としない試作や小ロット生産に最適です。
バックライト付き縦型ターゲット
Leveled, verified targets that minimize left-right focus gradients.
プロ仕様の施錠
UV+熱によるデュアルキュアが標準仕様ですが、カスタマイズも可能です。
品質保証
100%の光学検査および焦点確認。
迅速な対応
ほとんどのご注文について、通常2~3週間で配送されます。
ボリュームのスケーリング
100台から10,000台以上まで、一貫した品質でお届けします。
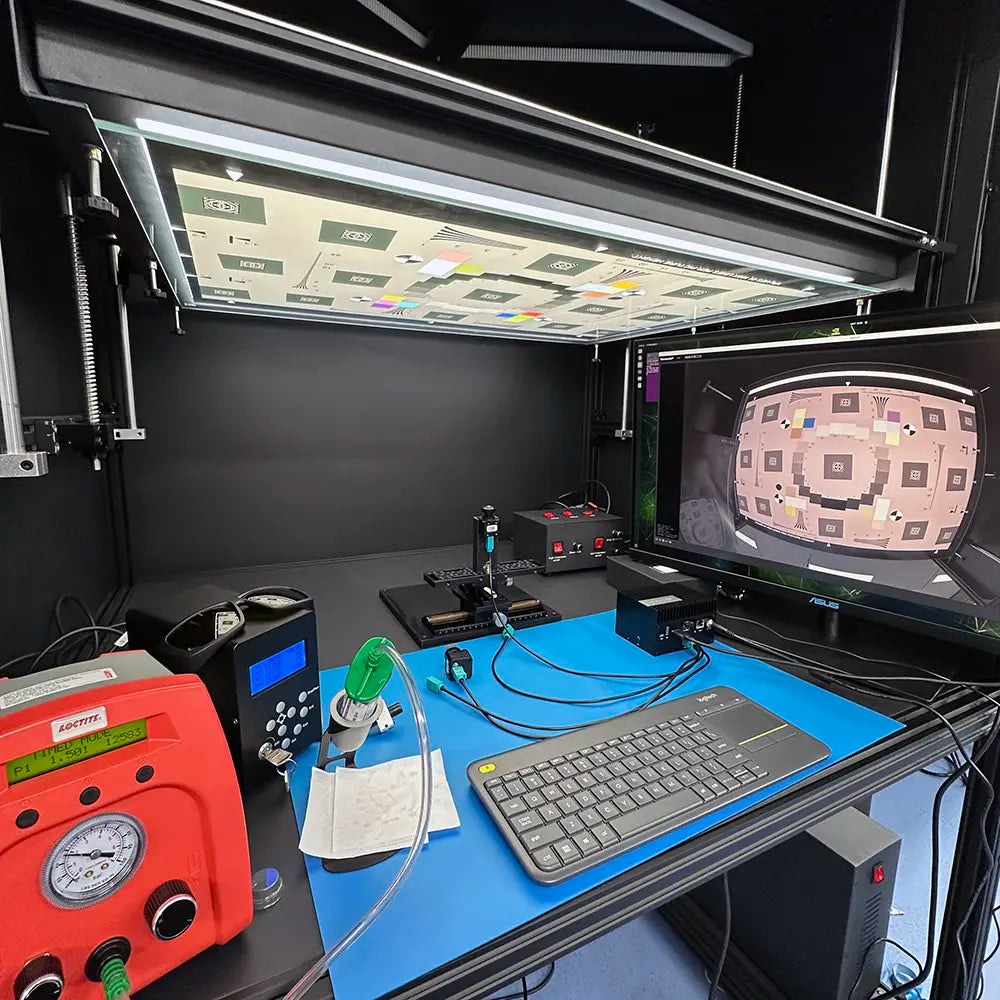
Minimum order quantity: 100 pieces. Learn more about our assembly services or contact our engineers to discuss your requirements.
集中力の課題を解消する準備はできていますか?
Our team handles lens focusing and locking so you can work on your application.
組立の見積もりを依頼するWhat Is Active Alignment? (OEM Production)
Active alignment optimizes focus while monitoring image quality in real-time, improving yield for high-volume OEM production. Whether it pays off depends on required yield, how tolerance-sensitive the design is, equipment amortization, cycle time, and how far passive fixturing gets you. The capital cost and changeover effort usually point toward large production runs.
The process uses 6-axis positioning with MTF or contrast feedback to optimize each unit individually.
アクティブ・アライメントが有効な場合
When It Pays Off: No universal volume threshold. Yield targets, tolerance sensitivity, and equipment amortization set the break-even, usually reached in high-volume OEM production
Yield Improvement: Higher first-pass yield
代表的な用途:自動車用ADASカメラ、スマートフォン用モジュール、ハイエンド監視カメラ
設備投資:アライメントステーション1台あたりの資本コストが相当高額
For lower volumes, manual focusing with proper fixtures and ceiling targets avoids that capital cost. Commonlands does not run active alignment: our camera module assembly service focuses lenses this way from 100 pieces, and automated focusing stations, each running 120 modules per hour, will be online for volume production by the end of 2026.
For the full technical breakdown, including the 6-axis error budget and UV-cure locking, read our active alignment guide for camera modules.
よくある質問
M12レンズのピント合わせの正しい手順はどのようなものですか?
Check safe thread travel and rear clearance first. Place a target at the required working distance, then sweep focus while comparing center and corner sharpness. Take up backlash and use a consistent final approach direction. Lock the setting with the specified ring or adhesive, then recheck focus. An M12 × 0.5 thread moves 0.5mm per full rotation.
Cマウントレンズのピントはどのように合わせればよいですか?
C-mount lenses have a fixed 17.526mm flange focal distance. Focus is achieved by adjusting the focus ring on the lens barrel rather than threading. Use the same target and verification procedures as M12. Lock with set screws on the focus ring or friction tape. Browse our C-mount lens collection for options matched to your sensor size.
なぜピント合わせに天井をターゲットにするのか?
A ceiling target provides a stable test distance and a convenient reference for leveling the target and camera fixture. That controls target-to-camera alignment. It does not remove lens-to-sensor tilt from thread or assembly errors. Use through-focus measurements across the field and adjust the lens, holder, or sensor alignment to correct those errors.
UV硬化とUV+熱のデュアル硬化の違いは何ですか?
UV cure adhesive typically sets in under a minute but may leave shadowed areas that don't fully cure. A UV-and-heat dual-cure adhesive can cure shadowed regions during a thermal stage. The required temperature and time depend on the adhesive and must remain within the module's temperature limits. Cure schedule, adhesion, and outgassing are adhesive-specific, so follow the manufacturer's datasheet and qualify the joint on your own assembly. We default to dual cure for automotive and outdoor applications.
アクティブ・アライメントとは何ですか?
Active alignment adjusts lens position while monitoring image quality metrics in real-time. This compensates for component tolerances by optimizing each unit individually. It's most common in high-volume production where consistent quality is required despite manufacturing variations. The break-even against passive fixturing depends on yield targets, tolerance sensitivity, and equipment cost. The process typically uses 6-axis positioning with MTF or contrast feedback.
時間の経過に伴うフォーカスのズレを防ぐにはどうすればよいですか?
Focus drift is prevented by: 1) Using proper locking methods (UV+heat dual cure for production), 2) Selecting thermally stable designs (all-glass optics help, but drift depends on the whole system: element powers, barrel and spacer CTE, adhesive), 3) Allowing adequate cure time before handling, 4) Using mechanical retention as backup for high-vibration environments. Our assembly service includes validated locking procedures for long-term stability.
Commonlandsでは、私のカメラモジュールの組み立てと調整を行ってもらえますか?
Yes. Commonlands provides complete camera module assembly: professional focusing, lens-to-sensor alignment, and permanent locking, using clean room environments and precision fixtures. Services include M12 and C-mount lens integration, custom fixtures, and 100% optical verification. Minimum order quantity is 100 pieces. Contact our engineering team to discuss your requirements.
自分のアプリケーションには、どのフォーカスロック方式を採用すべきでしょうか?
For production: UV+heat dual cure adhesive. For R&D: mechanical lock rings for adjustability. For prototyping: PTFE tape for temporary holding. For automotive/outdoor: we default to dual cure for temperature resistance. For serviceable products: lock rings with thread locker. Each method has trade-offs between permanence, strength, and reversibility.